Friday, November 30, 2012

Sock patterns released on Ravelry

I'm pleased to announce the release of two of my sock patterns on Ravelry.

Swirl Socks
Inspired by a dear friend who convinced me to give toe-up socks a chance, these socks are a quick and satisfying knit. The lines flow into one another, reminding me of swirls of water or ripples on a field of snow on a winter morning.

The 16 row pattern repeat includes a “rest” row of knit sts on every even numbered row, making this a very quick knit. The swirl pattern is 44 sts wide, running over the edge of the foot a few sts on each side.
The pattern is intended to be customizable. No two pairs of feet are the same and it’s easy to customize the width of the cuff or leg portion of the sock. That’s what I love about this pattern (the back of the sock is a simple broken 2x2 rib), if you need to make the circumference of the sock bigger or smaller, simply adjust the number of stitches by adding or removing repeats of these rib stitches. Note that adjustments to the pattern may change yardage requirements.


Trellis and Coin Socks
Inspired by some richly toned Handmaiden Casbah yarn, these socks were created to do justice to this lovely yarn. I wanted a pattern that was as voluptuous as the Casbah itself. For me, that means bold, stunning cables that capture the eye immediately.

This sock pattern is intended to be customizable. The back of the sock is a lovely alternating moss stitch and coin cable pattern. If you need to make the circumference of the sock bigger or smaller, simply adjust the number of stitches by adding or removing repeats of these stitches.

Tips and Techniques: Fit, ease, body and drape

While attending the NYS Sheep and Wool Festival (affectionately known to knitters as "Rhinebeck", for it location), I had the pleasure of attending a class by Lily Chin, knitting legend and possessor of so much knitting knowledge that she's a walking encyclopedia.

Most of the information she covered is certainly available in other locations (or in her books), but she has a knack of putting that information together, like putting puzzle pieces together to finally see the whole image.

Reviewing my notes from her class recently, I decided that a few things bear sharing.

Simply by picking out and lining up class participants in a specific order, Lily easily demonstrated the concepts of fit and drape. At one of the spectrum was a curve hugging t-shirt and on the other, a loose-hanging cardigan. When it comes to fit, the knitting industry as a few standard guidelines, although no general consensus, as anyone can tell when comparing pattern sizings.

However, I now use these fit guidelines when deciding how much ease I want my finished product to have. Ease being the extra inches of fabric added to the size of the garment over your actual body measurements.

Tight fit = -2" of ease
Close fit = 0"-1" of ease
Standard fit = +2" of ease
Loose fit = +4" of each
Oversized = +5" of ease or more

It is ease which defines the fit of your garment. For example, if your actual bust measurement is 38" and you want a tight fitting garment, following the pattern size that is closest to -2" of ease. That is to say, the size closest to having a 36" bust. But if you want a standard fit, choose the size closest to a size 40" bust.

A mistake I've made in the past was to look only at the extra inches of ease and think "That's too much!" But, as Ms. Chin explained if you're adding 2" of ease, that's 2 inches over the entire garment. Or in other words, half an inch (.5") on each side front and back. When spread out over the front and back side seams of a garment, it really doesn't seem like that much.

Back to drape. Drape can be defined as how much a fabric conforms to your shape. Does it hug your curves? Or does it fall stiffly in a straight line off your curves? Body is the opposite of drape. Heavier yarn creates a denser fabric that creates body.

Putting these all together can help you decide which size to knit. You need to consider:
  • your bust size
  • what kind of fit you want
  • the fabric size (this is where your swatch comes in)
Then find the size that is closest, according to how you want the garment to fit. Of course, these aren't the only factors. You have to consider your other measurements, like shoulder width, waist and hip width. But generally you pick the size based on bust measurements and can do any customization for other measurements from there. And the type of yarn certainly affects drape and fit. But those are topics for another day.


Tuesday, November 27, 2012

A Study in Socks


One of my favorite things to knit is socks. Perhaps this is because they can be miniature works of art, blending texture and color to produce infinite variations. They can be fun and playful like the Tsarina of Tsock’s latest sock club sensation, the Shark Week socks. Or they can be classic and understated, like some of the patterns in Favorite Socks, 25 Timeless Designs from Interweave. (I’ve knit several of the patterns in this book. Love them!) Or they can be fantastic works of art like Heijastuksia, Sokkene Jernverk, and the incredible Nightingale socks. 

Perhaps one of the most common comments from non-knitters is “But you can buy socks for $5 in a store.” True, but store-bought socks cannot replicate the complete foot comfort and individuality of the hand-knit sock. Hand knit socks just feel better. 

Sock knitters aren’t in it to save money. Quite the opposite, in fact. Sure, there are inexpensive wool and nylon blends available at big box stores. And there are a comfortable range of sturdy, serviceable and varied blends of sock yarn for every budget. But there are also luxury sock yarns, either by fiber content or by exclusivity (I’m looking at you, Wollmeise). Some of my favorite sock yarn is Handmaiden’s Casbah (80% merino, 10% cashmere, 10% nylon) which rings in at over $30/skein for a pair of socks. My local knitting friends know how much I rave about this yarn, calling it sex for your feet. It just feels that good.

When I began knitting socks, I followed the popular tutorial Silver’s Sock Class, which has created many a sock knitter. I started out struggling to master the use of double pointed needles (DPNs), poking myself endlessly on all those pointy ends. I knit way too tightly, trying to avoid laddering between needles. I knit so tightly that moving the yarn across the needle became a Herculean struggle. I naively thought that I had to knit tightly to end up with the perfect sock material. If I could go back in time I’d tell my new-to-socks-self that hand knitting will never replicate the tight weave and gauge of commercial socks!

In fact, I struggled with that first sock so much, that I gave up and refused to knit any more socks for about a year. I just couldn’t do it, I told myself. Sock knitting wasn’t for me. 

Hah!

Never say never.

Self-striping sock yarn sucked me back into my next foray into sock knitting. I loved watching that pattern reveal itself as I knit along, round and round. I made an effort to a) loosen my tension a bit and b) use wooden needles instead of the metal cheapies I’d used for my first pair. (My knitting was so tight on those metal needles that it would squeeeeeeeak as I tried to move it across the needle.)

Next thing I knew, I was learning something new with each pair of socks I knit. Or, as the case sometimes was – with each single sock that never found its mate.

What I’d like to do over the next few months is do a Study in Socks. Every week or so I’ll post about some aspect of Sock Knitting: yarn choices, heel and toe techniques, needles, patterns, notable sock designers and so forth. 

I hope you’ll follow along with me. Perhaps we can both learn some more about knitting socks.

Monday, November 26, 2012

And the winner is....

Dharma!

Thanks everyone for playing along. I can tell from the comments that many of you are already big Tin Can Knits fans. I also hope that some of you were introduced to amazing new designs.

Dharma - I'll be in touch to find out which book you'd like.

Thursday, November 22, 2012

Test Knit – Snowflake Sweater, newborn size


Back in October I jumped at the opportunity to test knit the Snowflake Sweater from Tin Can Knits. I was in the middle of a few longer projects: a sweater and some socks, so a quick baby knit seemed like the perfect antidote to the never-ending WIPs. Am I the only one who does this?


While the sweater is available in adult sizes I was looking for a quick knit, so I chose the 0-6 month size. I didn’t have a recipient in mind, but I knew that eventually the sweater would find its owner. After rummaging through my stash – another reason I volunteered for the test knit -  I found the perfect yarns: Garnstudio DROPS Merino Extra Fine and Stylecraft Pure Luxury Merino DK. Both are incredibly soft, of similar weight and looked perfect together. Little did I know that they were also perfect for the, as yet, unknown recipient.

The lace knit up easily and quickly. My only regret is that  the tip about blocking the lace section separately was posted after I’d already begun knitting the body. Seeing Alexa’s post about blocking the lace in a rectangle to really make it “pop”, it was clear how effect the technique was.

Baby items are the perfect ‘quick knitting fix’. You get a complete garment in a short amount of time. You can practice new techniques without the major time commitment. And let’s face it, if you make a mistake – who’s going to notice? Everyone will be oohing and aaahing about the cute baby!

And my Snowflake Sweater? It’s found a new home with a co-worker of mine whose son was born recently.

Monday, November 19, 2012

Interview & Giveaway - Tin Can Knit designs

 I thought I'd celebrate the newest book from one of my favourite design teams, Tin Can Knits, by interviewing Emily Wessel, one half of the dynamic design duo.

But before we start the interview....

GIVEAWAY!
In addition, I'm going to give away a copy of one of their books. Leave a comment, get your friends to leave comments, by 11:59pm EST, Sunday, Nov 25th, 2012 and one lucky winner (selected by random number generator) will receive the e-book of their choice from Tin Can Knits. Don't forget to either leave your Ravelry name or check back on Monday to see if you've won!

How did Tin Can Knits get started?
We met while we were both working at our local yarn shop - Urban Yarns in Vancouver.  A year, two moves, and some crazy ideas later Alexa and I decided to put together our first book: 9 Months of Knitting.  Alexa was pregnant, so baby projects were on her mind!

Photo courtesy of Alexa Ludeman

How do you & Alexa decide who does what in your partnership?
The division of labour at Tin Can Knits happened organically; essentially we try to play to our strengths.  Alexa and I both bring very different things to the partnership.  I am trained as an architect, and so I come from a background of design, layout, and producing detailed documentation for construction... not that far off of the requirements for pattern design and technical editing, so I take the lead on that side of things.  Alexa is avid photographer, and has a great eye for colour and a great sense of what will be desirable in a knitting project.  She is trained as a teacher, and has taught knitting for years, so she always has great ideas for projects that would work well for beginners and people learning new techniques.


Where do you find your inspiration?
We find that inspiration is everywhere.  We are mostly inspired to make things for our families, our friends, and ourselves, really!  I find my best ideas strike when I am relaxing and allow my mind to wander.  Alexa finds a lot of inspiration through her photography, travel and teaching.


Do you have a favorite knitting technique, either personally or that you like to feature in your designs?
Alexa and I are always learning new techniques and incorporating them into our designs.  I love lace, which is pretty obvious given my lace designs! Alexa is a total sucker for cables.  There are few techniques which I don't like!  I have recently learned intarsia for example, and immediately used it in two sweater designs, and I have a design for next year's book which will use that technique.  For me any technique is simply a means to achieve the finished result that I desire!

Photo courtesy of Alexa Ludeman
One of the unique things about your designs is the tremendous range of sizes, from infant to adult plus sizes. What was the thinking behind that?
As designers, we believe strongly in providing good value, and making user-friendly designs which are accessible to a wide range of knitters.  We saw how many adorable adult patterns there were which would be amazing if re-imagined for babies, and at the same time, how many baby patterns would be adorable on adults, and saw an opportunity.  Also, sizing patterns to 4XL  just seems like the right thing to do; there are many plus-sized knitters; and we believe our designs should be accessible to everybody.  While the decision to size our patterns from baby to grandpa requires some consideration in the initial design, and more time in pattern writing / editing / testing phases, we believe that it is worthwhile, and we hope knitters agree!  On a less serious note, we just think it is mind-blowingly adorable to have matching mommy - baby knits!

Are there any designers in the knitting world who inspire you?
Elizabeth Zimmerman, Jane Richmond, Brooklyn Tweed, Joelle Hoverson, Debbie Stoller, Ysolda Teague, Barbara Walker, Alice Starmore, Kaffe Fassett, Kate Davies... and many more!

What have you learned since you've published your first pattern?
Since Alexa and I published our first pattern, we have learned basically everything; and we are still learning from our fans, our pattern testers, and through critiques from our peers in the design world.
What we are getting better and better at is taking an idea from concept through to completion in a structured way.  When we wrote 9 Months of Knitting, we didn't have a grand vision of how the collection would be styled, and it just came together organically.  With Pacific Knits we developed a clear idea of style and the contents the book needed to have early on.  Great White North was imagined / styled / and a pattern list created all at once, so it has a very cohesive aesthetic.

What are your goals for Tin Can Knits? How do you define success for TCK?
Right now we are focused on building a business that will be sustainable long-term and allow us to have flexible schedules.  As a woman coming from a professional full-time background, who is looking forward to having children, my dream is to be self-employed and have flexibility that will be beneficial when I do have kids.  Alexa would love to continue to stay home with Hunter and Jones.  So while we do have grander visions for the business, we define success by our ability to create our own professional jobs, which allow us some flexibility in balancing work family obligations. 

Tell me about your collection of patterns. I understand you have a new book of patterns out for the holidays.
Our first design 'baby' was 9 Months of Knitting (2011)... not surprisingly coinciding with Alexa's first baby! 

The second (and my most beloved) is Pacific Knits (2012), which is packed with designs that I personally love to death and nostalgia-inspiring photography of my homeland.  I just think it is a great example of our best work.  Interestingly enough, Alexa delivered her second baby, late, about 24 hours after Pacific Knits went to print!  I felt really guilty asking her to edit and take more last-minute photos when she was past her due date... but I did ask!

We have just launched our third collection as an ebook : Great White North (2012), and is has some really adorable gift knits inspired by the holiday season.
Photo courtesy of Alexa Ludeman
Do you have a favorite pattern in the collection? If so, what is it about that pattern that attracts you to it?
I can't really talk about my favourites... but I did almost stop editing mid-way through the collection in order to cast on a Snowflake sweater for myself...  And Alexa keeps making noises about making a Drift blanket for Jones (to which I reply 'you don't have time to knit a blanket!').  Also I plan to knit a bunch of Fancy Balls (free pattern!) for Christmas gifting this year!  Oh my... so much to knit and so little time!

Thanks to Emily of TCK for taking the time to chat with me. Now it's time for me to find the perfect yarn to cast on for Drift!

Sunday, November 18, 2012

Alpaca Open House excursion

Saturday was that special kind of late fall day that made you want to spend the day outside soaking up all the vitamin D-filled sunshine that you can. To stock up enough sunshine to get you through the next 4 months of winter. In short, it was the perfect day to visit an alpaca farm & store.
1Stop Alpaca Farm


My friend, Nancy Hutchison, owns and runs the 1StopAlpacaFarm in north Durham Region, Ontario. Her farm is home to over 60 alpacas. Yesterday she had an open house and tea party, and I jumped at the chance to go visit the alpacas.


Fishing out the dogs' ball from the pond.

My daughter and her friend were eager to go too. My daughter loves the sheep dogs that roam free on the farm and who are always eager to play ball or frisbee with visitors.

Hellooooo!


 The alpacas were very curious about all the visitors. And we were all curious about these beautiful creatures with the lovely, soft "fur".

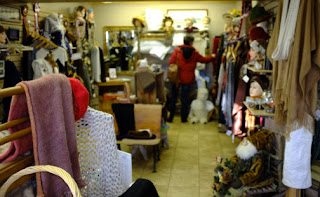
Nancy's shop is chock-a-block with amazing alpaca goods: mittens, hats, scarves, shawls, sweaters, coats, natural soaps and deodorants. And of course, there are lovely alpaca batts for spinners and yarns for knitters, all sourced from the alpacas on the farm.


 This wasn't our first trip to Nancy's farm. In the spring she holds an open house during the alpaca shearing, complete with several vendors, refreshments, and jumping castle for the kids. Nancy uses the open house as a fundraiser for Hearth Place, in Oshawa.

Hearth Place provides support and resources for people living with and fighting cancer. The organization holds a special place in Nancy's heart, ever since she fought and won her own battle with cancer in recent years. Her shearing open house is always well attended. We've gone every year for the past 4 years.

This weekend, I noticed that the alpacas' coats were really getting thick again since the May shearing. There were also a few baby alpacas - called cria.


After spending some time listening to the alpaca's gentle chattering and mewling, I headed into the store for a browse. After debating and inspecting all the beautiful items on sale, I settled on a pair of alpaca mittens. Yes, I could knit my own pair, but I like supporting local businesses, and honestly, I'm not that crazy about knitting mittens - the finger part is so fiddly.

Nancy also cleverly packaged up some yummy alpaca batts as "Fibre Blizzards", complete with straw. A couple of those may have followed me home too. The cups are deceptively small. At home I opened up my first "Blizzard" and unpacked a huge batt of soft fibre. I couldn't believe it had all fit into the cup!

The "Blizzard" is made of alpaca fibre blended with recycled sari silk, which adds a fun bit of colour to the white alpaca wool. I'm going to have fun playing with spinning this up.

I guess you could say that I'm not 'sari' I brought it home.

The farm's slogan.


Friday, November 16, 2012

Yarny goodness on display

Out in the sunshine!
Adding color to a plain corner.
I've been camera-less for the past week, hence my lack of posts. But this morning I got my hands on our camera and had to snap a few shots of my purchase from last weekend.

I spotted this vase at Walmart for a mere $19.99 and decided it was just the perfect thing to display some of my pretties in my knitting room. I've been having fun arranging and re-arranging different rovings and skeins of yarn in the vase.


Friday, November 9, 2012

Tips and Techniques - In the Round

Today's tip is a quick and easy one. I have to admit it's not mine, but I don't remember where or when I picked it up.

Ever experienced a messy join when knitting in the round? Laddering between needles is a big enough problem, but I could never seem to get a nice join in that first round of knitting. Until I read this tip:

When knitting in the round, cast on 1 extra stitch. When it comes time to join, move that extra stitch from the last needle onto the first needle. Then, knit (or purl) the extra stitch and the first stitch of the round together. That should give you a nice snug join and help minimize any gap or additional laddering.

That's it! Easy peasy.

Wednesday, November 7, 2012

Leap of Faith - progress

I'm surprised at how quickly this knit is zipping along. I'm 9.5" from the cast on edge. This cardigan is knit in the round and then will be steeked to add in a zipper.

If you're on Ravelry, you can find more details about the pattern in the test knit thread (link below) and have the designer ear burn you when the pattern is available.

Leap of Faith cardigan, Nov 5 @ 7" from CO edge


Pattern: Leap of Faith Cardigan
Status: Test knit in progress. Pattern not released yet.
Yarn: Cascade Heritage Solids sock yarn in Bark
Needles: 3.25mm
Started: Oct 31st

Monday, November 5, 2012

Who? Who? Owl, that's who!

Or rather, Owl Puffs!

For fun, I made a couple of these for my daughter using some stash yarn. This one is some cotton yarn held double and then some hand spun yarn for the top part. He's a little misshapen, but that's just because of the love he's been given.


Sunday, November 4, 2012

Multi-tasking

I used to be a reader until I learned to knit and became a knitter. Where I used to pack 4 novels in my suitcase when prepare for a trip, I now pack 4 knitting projects. (Did I really think I'd have time to work on 2 socks, a shawl and a sweater during my 4 day trip to Rhinebeck?)

But I've found a way to combine my two loves: reading and knitting. I listen to audiobooks while I knit. With television, I find I end up more watching than knitting. But audiobooks fill the silence nicely and keep my mind engaged while I knit.

Picking the right book to listen to is important. If I'm knitting stocking stitch or something else that's easy to follow, I listen to a new book since I'll want to pay more attention to the story. If I'm doing something complicated, like lace or an intricate pattern, then I choose a book I've read/heard before so I don't miss out on the story if I have to focus on the pattern a bit more.

While there are free audiobooks out there, the quality isn't as good as the professionally produced ones. I get mine from audible.com. I have an annual membership that gives me 24 credits to spend on books throughout the year. Usually 1 book = 1 credit, except for especially long duration books which may be 2 credits. This works out to approx $12 per book, when the usual non-membership price is $20-40 dollars depending on the author or length of the book. Audible also has 3 month memberships for those seeking less commitment.

Once you download the books onto your computer, you can listen to them immediately. Or, you can load them into iTunes and put them on your iDevice of choice or even on your Kindle.

Happy knitting and listening!


Saturday, November 3, 2012

Test knit - Leap of Faith cardigan

This test knit is certainly a leap of faith for many reasons. It's the Leap of Faith cardigan as posted in the Free Pattern Testers forum in Ravelry.

I agreed to test knit this project initially for two reasons: I wanted to learn how to do a steek and I like the look of the finished cardigan. The name of the cardigan, comes in part, from the steeking required to open up the cardigan, which is knit in the round. It certainly is a leap of faith to cut your knitting in half.

Well, as I've come to realize, it's also a leap of faith to knit a cardigan in fingering weight sock yarn, when you're knitting a plus size. Each round takes forever! But it's coming out beautifully. I've chosen a lovely chocolate brown colorway of Cascade Heritage sock yarn.

As a reward for completing a few rounds, I'm allowing myself to work on a few rows of a Swallowtail Shawl in a lovely merino "Spice" colorway from SheepyTime Knits' Speshul Snowflakes Yarn Club.

Friday, November 2, 2012

Tips & Techniques: Lily Chin edition


While at the NYS Sheep and Wool Festival in October, I attended a workshop led by Lily Chin, master knitter and designer extraordinaire. The workshop was titled “Custom Fitting Existing Patterns” and promised to demonstrate “how to successfully personalize the fit of a pattern and cater it to yourselves or those you knit for… You’ll learn simple refinements and easy modifications that don’t require extensive pattern re-writes, but will produce great results.”

Let me tell you, this class delivered all that and more. Lily is a personable and effective instructor, leading us step by step through the basic calculations which built upon each other until we were comfortable with, and ready to, design our own patterns. If you ever have a chance to take a class with Lily, do it!

Not much of this information is secret – if you’ve read knitting magazines, blogs or Ravelry for any length of time, a lot of it might be familiar to you. But Lily stepped us through it and helped us make the connections to put it all together. I'll share some of the tips here.


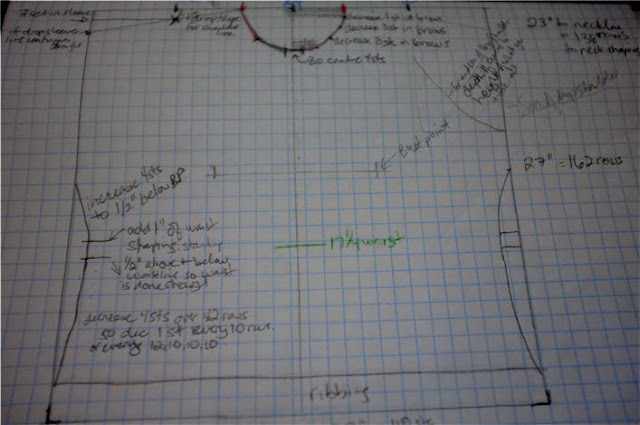
We started out by taking some basic measurements. Lily had us measure our hip measurements (or wherever we preferred our garments to end). Then came the neck to hemline measurements. Using this, we could graph out the basic rectangular shape of a garment. Each square on the graph paper equalled 1” of garment. Then we measured our shoulder-to-shoulder widths, neck width, and preferred neckline depth, each time graphing these onto our schematic. 

Sample schematic based on actual measurements (+ 4" ease) and with gauge of 4 sts x 6 rows
Lily pointed out a couple interesting facts about our shoulder-to-shoulder and arm length measurements. Despite there being 10 very different body types in the class, there was no more than a 2” variation in the measurements from lowest to highest. This is because our basic skeletal structures vary very little. It’s just the surrounding padding that creates the diversity. 

This is interesting because many patterns keep making sleeves longer the bigger the pattern size, but really, there’s not that much variation or even relation between sleeve length/shoulder width and plus sizes. So keep an eye out for this in any patterns you’re choosing to knit.

Next came a segment on sleeves. We learned about drop shoulders, some variations Lily called “Son of Drop Shoulder” and then “Grandson of Drop Shoulder” and the calculations for each. Sleeve measurements were added to our sketch.

Graph paper is all well and good, but it isn’t a fair representative of knitting stitches, which are taller than they are wide. Graph squares are, well….square, not rectangular. The answer is to obtain gauged graph paper, which can be generated for any gauge; every square represents 1 actual stitch of knitting. This allows you to fine tune your garment necklines with accurate increase and decrease placements on each row of knitting. If you Google “gauged knitting graph paper”, you’ll come up with some programs to generate these for you, both free and paid.

Neckline decreases sketched out as if on gauged graph paper.
Draw your neckline and then mark where the right side decreases should fall.
Another interesting tip that Lily mentioned was to use the big tablet of presentation graph paper that is sold at Staples and other office supply shops. These are made of 1” squares, so you can trace your favorite fitting garments to make templates for knitting similar items. This will show you exactly where your waist increases and decreases should fall, and where to place shoulders, armholes and necklines. Once you have the tracing of the life size garment, transfer those measurements to your gauged graph paper to do the fine-tuning of number of decrease and increase stitches at each point.

Sure, these methods take some time and thought, but in the end you get a garment that is knit exactly to your measurements, designed to fit and flatter you.

Key points:

  • Take your measurements! Have someone help you so that you get the most accurate measurements possible. Without knowing your true measurements, you can’t customize your knits.
  • Do a gauge swatch, as big as possible. Without accurate gauge numbers, you can’t calculate where to put your increases and decreases for armholes, necklines and waist shaping.
  • Sketch it out! Put your measurements and the pattern’s schematic on graph paper, using 1 square = 1 inch.
  • Trace a favorite garment on presentation graph paper to get a life sized pattern. You’ll know exactly where to place waist shaping and how big/small to make armhole shaping based on something that already fits and suits you.
  • Use gauged graph paper to figure out the details row by row.
  • Knit something beautiful and wear it with pride!