While at the NYS Sheep and Wool Festival in October, I
attended a workshop led by Lily Chin, master knitter and designer
extraordinaire. The workshop was titled “Custom Fitting Existing Patterns” and
promised to demonstrate “how to successfully personalize the fit of a pattern
and cater it to yourselves or those you knit for… You’ll learn simple
refinements and easy modifications that don’t require extensive pattern
re-writes, but will produce great results.”
Let me tell you, this class delivered all that and more.
Lily is a personable and effective instructor, leading us step by step through
the basic calculations which built upon each other until we were comfortable
with, and ready to, design our own patterns. If you ever have a chance to take a class with Lily, do it!
Not much of this information is secret – if you’ve read
knitting magazines, blogs or Ravelry for any length of time, a lot of it might
be familiar to you. But Lily stepped us through it and helped us make the
connections to put it all together. I'll share some of the tips here.
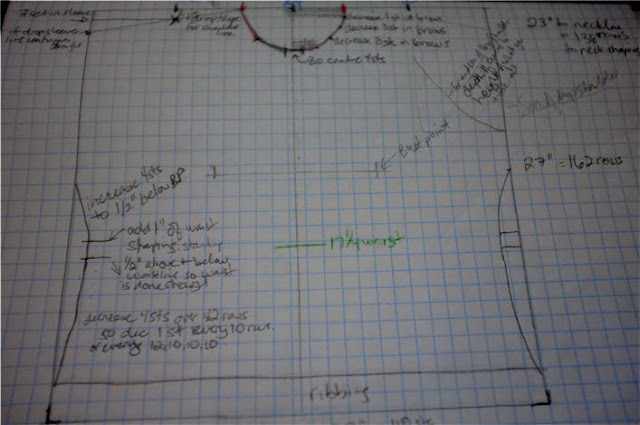
We started out by taking some basic measurements. Lily had
us measure our hip measurements (or wherever we preferred our garments to end).
Then came the neck to hemline measurements. Using this, we could graph out the
basic rectangular shape of a garment. Each square on the graph paper equalled 1”
of garment. Then we measured our shoulder-to-shoulder widths, neck width, and
preferred neckline depth, each time graphing these onto our schematic.
 |
| Sample schematic based on actual measurements (+ 4" ease) and with gauge of 4 sts x 6 rows |
Lily pointed out a couple interesting facts about our
shoulder-to-shoulder and arm length measurements. Despite there being 10 very
different body types in the class, there was no more than a 2” variation in the
measurements from lowest to highest. This is because our basic skeletal
structures vary very little. It’s just the surrounding padding that creates the
diversity.
This is interesting because many patterns keep making sleeves longer the bigger
the pattern size, but really, there’s not that much variation or even relation
between sleeve length/shoulder width and plus sizes. So keep an eye out for
this in any patterns you’re choosing to knit.
Next came a segment on sleeves. We learned about drop
shoulders, some variations Lily called “Son of Drop Shoulder” and then “Grandson
of Drop Shoulder” and the calculations for each. Sleeve measurements were added
to our sketch.
Graph paper is all well and good, but it isn’t a fair representative
of knitting stitches, which are taller than they are wide. Graph squares are,
well….square, not rectangular. The answer is to obtain gauged graph paper,
which can be generated for any gauge; every square represents 1 actual stitch
of knitting. This allows you to fine tune your garment necklines with accurate
increase and decrease placements on each row of knitting. If you Google “gauged
knitting graph paper”, you’ll come up with some programs to generate these for
you, both free and paid.
 |
| Neckline decreases sketched out as if on gauged graph paper. Draw your neckline and then mark where the right side decreases should fall. |
Another interesting tip that Lily mentioned was to use the big
tablet of presentation graph paper that is sold at Staples and other office
supply shops. These are made of 1” squares, so you can trace your favorite
fitting garments to make templates for knitting similar items. This will show
you exactly where your waist increases and decreases should fall, and where to
place shoulders, armholes and necklines. Once you have the tracing of the life
size garment, transfer those measurements to your gauged graph paper to do the
fine-tuning of number of decrease and increase stitches at each point.
Sure, these methods take some time and thought, but in the
end you get a garment that is knit exactly to your measurements, designed to fit
and flatter you.
Key points:
- Take your measurements! Have someone help you so that you get the most accurate measurements possible. Without knowing your true measurements, you can’t customize your knits.
- Do a gauge swatch, as big as possible. Without accurate gauge numbers, you can’t calculate where to put your increases and decreases for armholes, necklines and waist shaping.
- Sketch it out! Put your measurements and the pattern’s schematic on graph paper, using 1 square = 1 inch.
- Trace a favorite garment on presentation graph paper to get a life sized pattern. You’ll know exactly where to place waist shaping and how big/small to make armhole shaping based on something that already fits and suits you.
- Use gauged graph paper to figure out the details row by row.
- Knit something beautiful and wear it with pride!
So my knitting challenge to myself this coming year may end up being a wearable sweater. And if it is, I will totally come back to this post. Thank you so much.
ReplyDeletewow - so much information in one small space! This is very helpful, thanks for sharing.
ReplyDelete